Hello everyone,
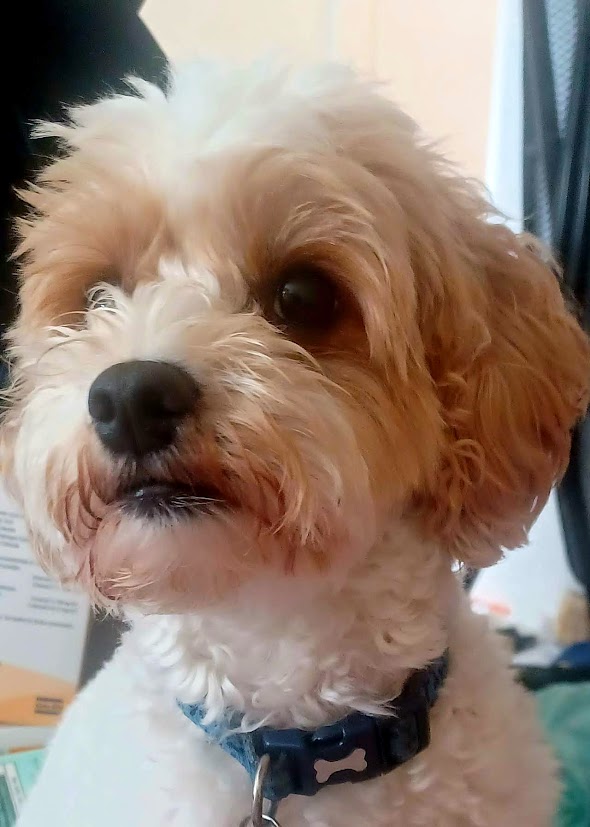
I hope you are all having a good week. I can’t believe one month of 2024 has flown by already, time is definitely flying by. I’ve been working part time now for a month and am feeling so much better for it. Herbie and I have been having lots of lovely walks. If he had his way everyday would be to the beach. We can only visit our local beach until the beginning of May then dogs are banned for the summer so we are making the most of it whilst we can. He loves running along the sand making new friends and having a game of chase.


New classes coming soon
I am excited to share I have two new classes starting very soon. The first is on the 3rd Tuesday of the month and will be held upstairs at Brixham Theatre. This class is from 10 – 12pm. The cost is £15.00. I will bring everything you need to make 3 beautiful cards. The only access is up a flight of stairs but once up there it’s a lovely cosy room that can hold 8 people. For my customers that struggle with stairs I am on a mission to find a venue and will be back very soon with an update.
My second class I am calling a card and a glass, It’s £5.00. It’s going to be held on the 3rd Friday of the month at Brixham Conservative Club from 4 – 6pm. For your £5.00 you will have a kit containing everything you need to create your card and a donation towards a drink from the bar. This class is for anyone who fancies having a go at card making. I will have plenty of supplies so if you would like to buy another card you will be able to. Each card made has a donation in the price for a drink.
There’s is also my monthly evening class at Chestnut Community Centre on the 2nd Monday of the month.
If you would like more information about these please send me a message..
Quick and easy birthday cards
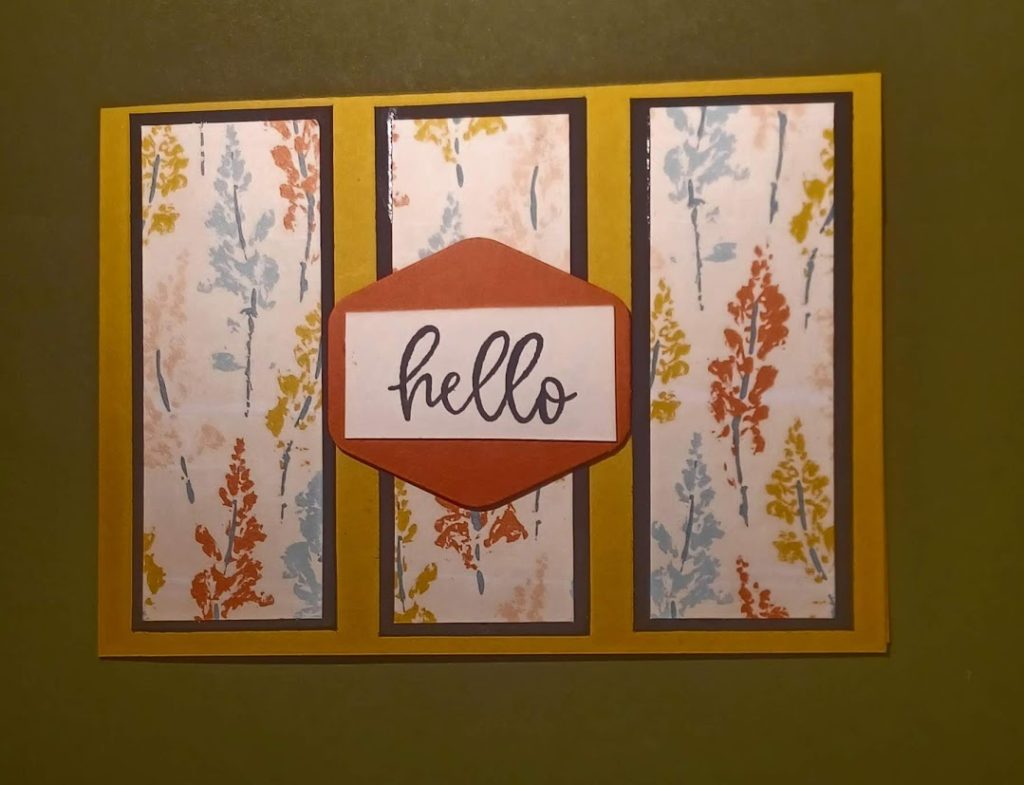
One of my goals I have set myself for 2024 is to make and send out cards regularly so that people know I am thinking of them and make them smile. January is one of those months where I appear to have a lot of birthday cards to make. I love cards that are quick and easy and look stunning. I thought you might like to see one I created this week.
Here are the directions to make it.
- First you need to cut a piece of card 14.8cms and score at 10.50cms
- Next cut 3 strips of co-ordinating card 4.5cms x 10cms
- Now cut 3 strips of contrasting patterned paper 4cms x 9.50cms
- Glue the patterned paper to the contrasting card and glue this to the card base leaving a little gap between each strip.
- Next I stamped my sentiment and stuck this on to my punched shape using dimensionals (sticky dots) .
- Finally I cut a piece of Basic White 10cms x 13.4 and stamped my sentiment inside.
I love this layout as it can be used for all sorts of reasons.
Fiona’s simple way to cover up a mistake
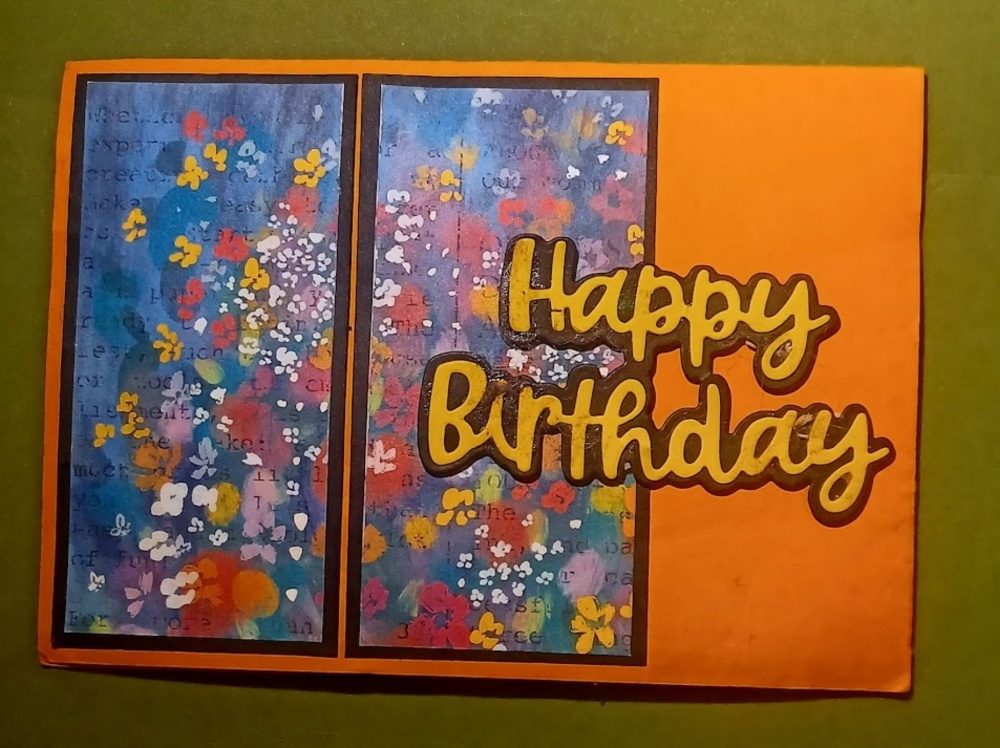
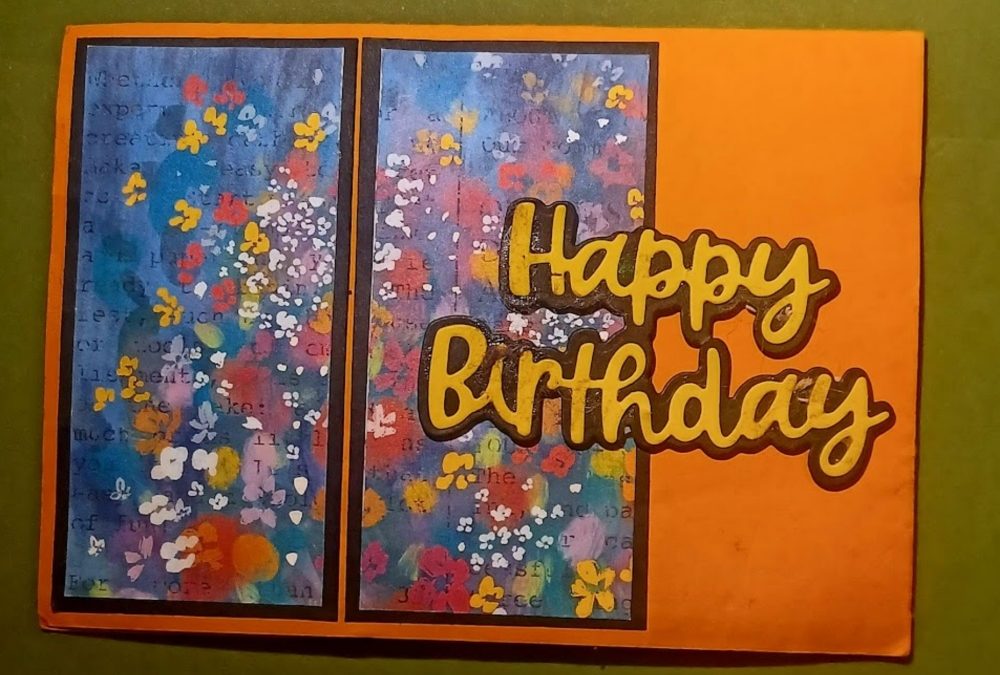
I thought I would share this one which was my original version which I made a mistake on. I made the strips too wide so I could only fit two on the front. I put the third one inside. Just to make it a bit different I used one of my embossing folders to emboss the front of the card base and used one of my favourite die sets called “Wanted To Say” dies to cut out the happy birthday. I love how it is a die set that cuts a border and the words. I stuck with glue one to the other and mounted them on dimensionals (sticky dots). I just wanted to show that there is no such thing as a mistake in card making it’s just a happy accident. I actually like this one most and will make more like this in the future. Which do you prefer? I would love to know.
Well that’s it from me for now.
Until I write again stay safe and happy crafting.
Fiona
Product list
Free Tutorial With all Orders
When shopping through my Stampin’ Up! Online Shop, you will receive a FREE TUTORIAL of 11 simple card ideas. Learn More!
If you wish to shop with me, please click here
Thank you for shopping with me.
I am an Independent Stampin’ Up! Demonstrator for the UK, France, Germany, Ireland, Belgium, Austria, and the Netherlands.
Herbie and I would love you to shop with us. If you set up an online account with us and opt in for Stampin’ Up! Rewards for every order over £20 you will receive 10% rewards to use on your next order, or you can do like I do and save them for a future order. They soon mount up, enabling you to purchase more expensive products with your saved rewards. Please do ask if you need any help.
KITS, I particularly love the Kits as everything is included, making them ideal for the beginner crafter, the crafter with limited space, they make beautiful birthday presents and are small enough to pack to take away on holiday. There are two new kits every month.
ONLINE EXCLUSIVES These are beautiful products that aren’t in any catalogue. Check back regularly as it’s frequently updated.
LAST CHANCE PRODUCTS – These are products about to retire. There’s up to 60% off normal prices, while stocks last. Why not grab yourself a bargain
Postage is a flat rate of £6.95/€7.95 on all orders.
🌟 Got a crafty wish list a mile long? Why not come and join our team, The Crafty Caterpillars! We’re building a welcoming, inclusive community where everyone’s invited to create, connect, and have fun. Whether you’re a beginner or a seasoned crafter, we’d love to craft with you—in person or online!
🎁 Right now you can grab £130 worth of products for just £99
If you need any help or have any questions, please send us a message.



Wow what a month you have do good luck for you step forward you can do this you are such a clever person and full of love and helping people
Thank you Zoe for being there and supporting me in my dream.
As always a beautiful card.
You’ve got this!
Thank you so much.
A beautiful card as always.
Look forward to hearing more about Herbies adventures, and your card making classes.
Thank you Mandy.
Love your cards and specially the one with two panels. Remember there are never mistakes when card making as we can adapt them. Well done xx
Thank you Cheryl.