Hello Everyone,
Today, I wanted to show you how I used the One Sheet Wonder design to create a batch of beautiful cards from just one sheet of 30cm x 30cm (12″ x 12″) patterned paper—or Designer Series Paper as it’s known by Stampin’ Up.
A one sheet wonder is an amazing technique that lets you transform a single sheet of patterned paper into multiple beautifully crafted cards in no time. Sometimes like today for speed I will use a sheet of designer series paper and other times I will stamp all over a sheet of Basic White cardstock to create my own unique design to use for my projects.
What makes the One Sheet Wonder so special is its versatility—there are endless ways to cut and arrange your paper, ensuring every batch of cards feels fresh and unique. It’s also a good technique to use when you need a batch of cards in a hurry and want each one to be different. It’s one of my favourite ways to get creative quickly while still producing stunning designs. Every time I use it, I’m amazed by how varied and original the results turn out.
This week, I needed to make a batch of greeting cards—some to send to friends, and others to replenish my stash. It’s always such a good feeling to have a few cards on hand that are ready to go when you need them. Just write a message, pop it in the post, and you’re all set!
For this project, I turned to my current favourite papers called Mixed Media Florals. It’s absolutely stunning, filled with bright and beautiful flowers that work for so many occasions—birthdays, anniversaries, “thinking of you,” or simply “hello.”
While there is a coordinating stamp set and dies available for this paper, I kept things simple for this batch of cards. I didn’t use the stamp set or dies—I wanted to really highlight how the paper alone can do so much of the work when you use a One Sheet Wonder layout.
The result? Two gorgeous card designs (and more on the way!) that came together so quickly—and looked like I spent hours crafting. That’s the magic of this technique!
If you’ve been sitting on a stash of pretty papers and aren’t sure where to start, give the One Sheet Wonder a try. It’s a great way to use your supplies and create a lovely little collection of handmade cards in no time.
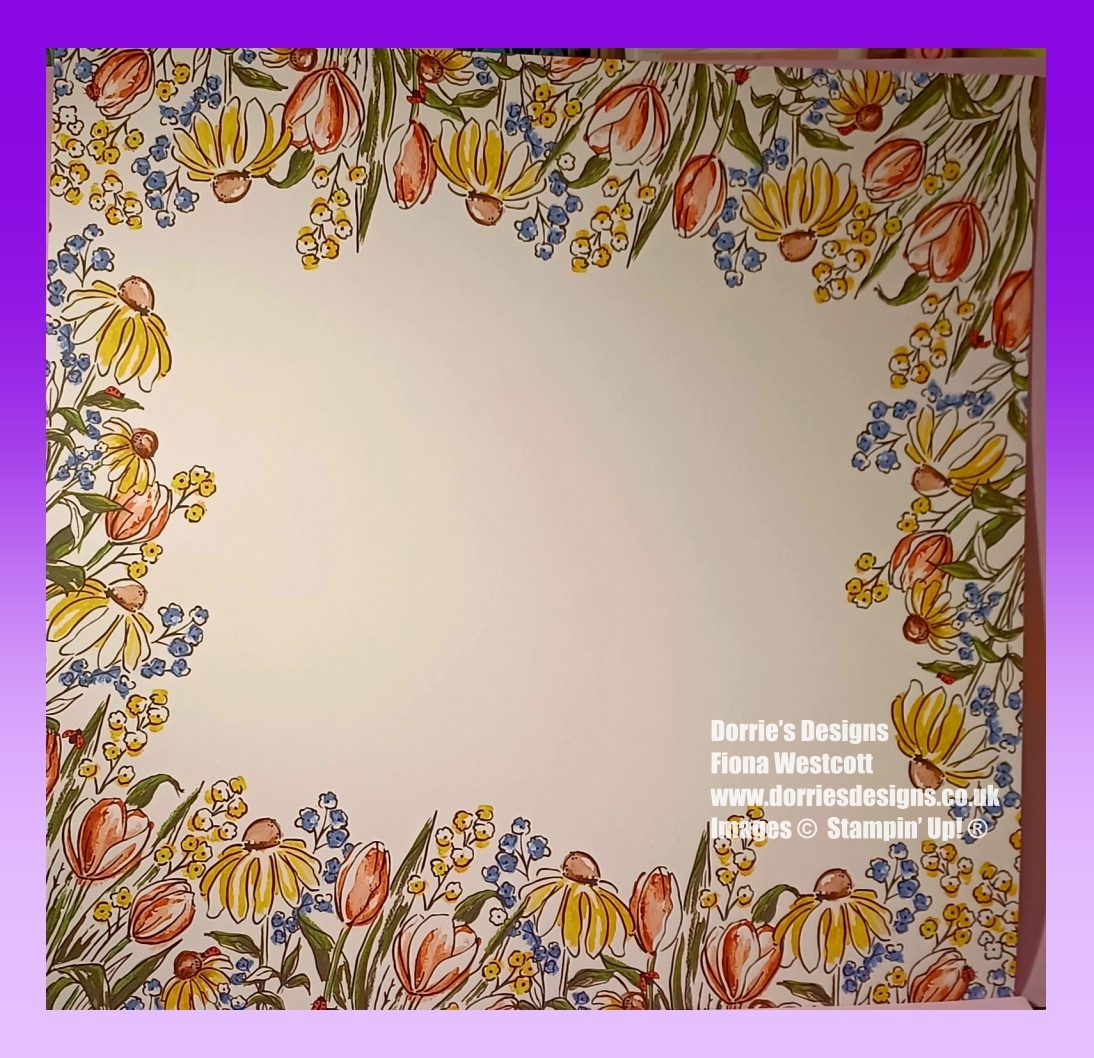
My chosen sheet of Mixed Media Floral Sheet of patterned paper
To begin, I cut the 30cm x 30cm sheet of patterned paper in half at 15cm, right down the middle. If you’re using directional paper, just double-check that it’s the right way up before cutting! Then, I took each of those two strips and cut them into 10cm sections—this gave me three pieces from each strip, for a total of six panels.
Each card I made used one of these panels as the focal point, making it super quick and easy to build a batch of beautiful cards.
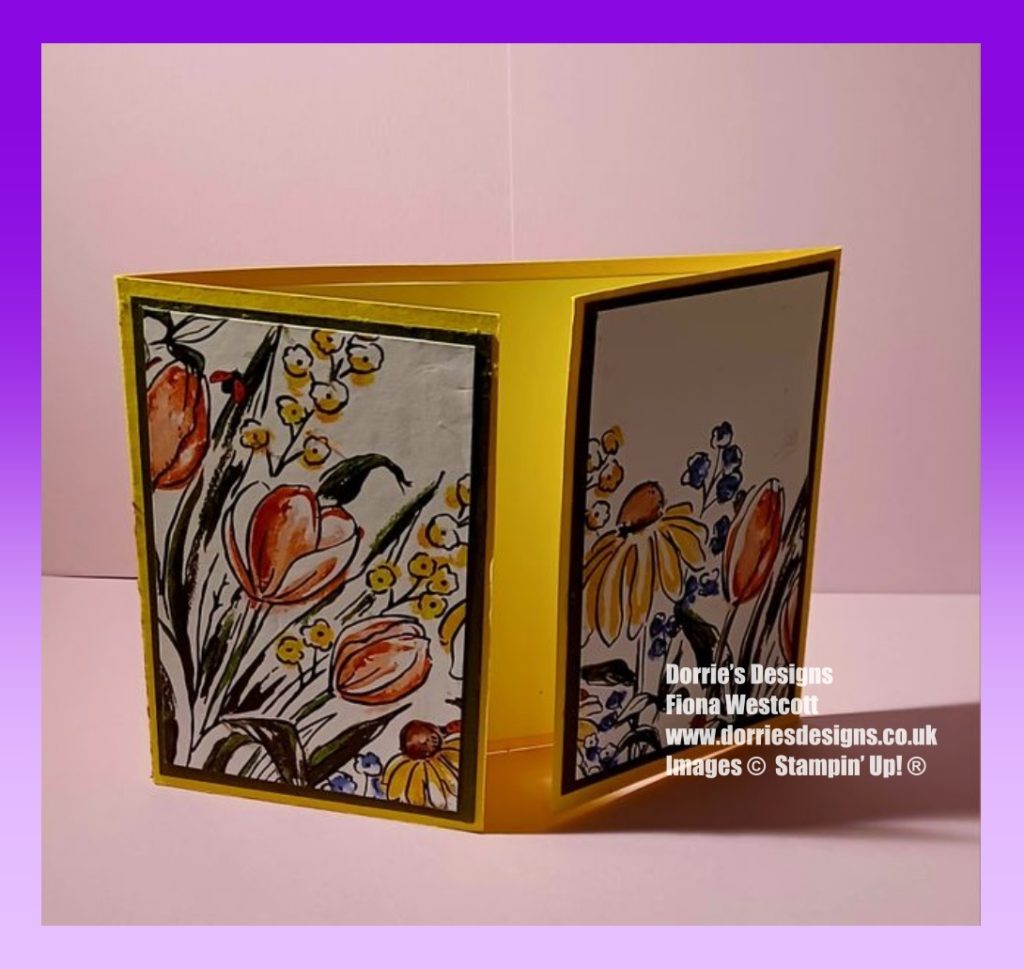
How I made my first Greeting Card from my One Sheet Wonder
I started with a piece of A4 Daffodil Delight cardstock and scored it at 14.85 along the long edge. I always prefer to score first—it means when I cut the cardstock, I instantly have two card bases ready to go!
Next, I cut the cardstock at 10.5 cm along the short edge, which gave me two card bases.
I then burnished the score lines with my bone folder to get those lovely, crisp folds.
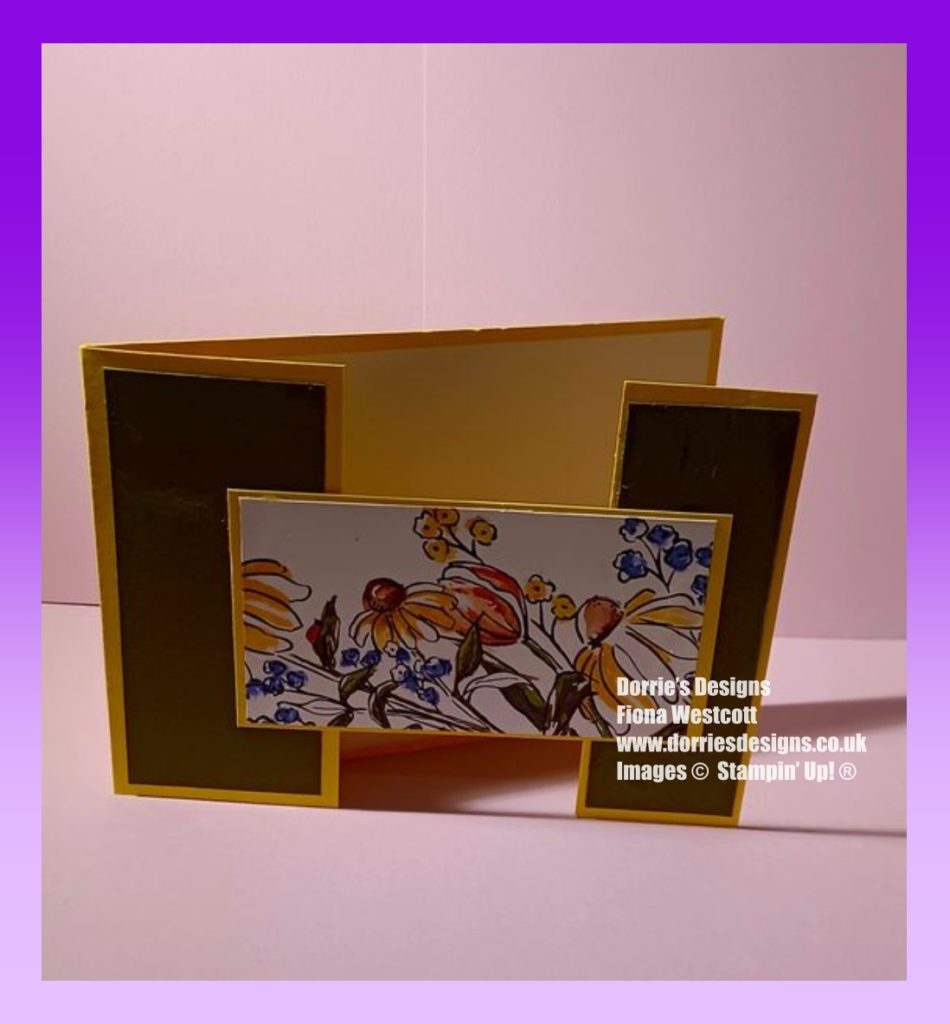
To create an interesting front panel, I scored again on the front flap at 3 cm along the long edge. I glued down the section between the centre fold and this 3 cm score line to create a slightly raised panel, giving the card a little extra dimension.
Then it was time to add my layers. I cut two pieces of Mossy Meadow cardstock for my matting layers:
- One at 10 cm x 2.5 cm
- One at 10 cm x 12 cm
I glued these to the front of the card.
From one of my pre-cut pieces of Mixed Media Florals patterned paper, I trimmed two more layers:
- One at 9.5 cm x 2 cm
- One at 9.5 cm x 11.5 cm
To show a little variation I flipped the smaller piece over and then stuck both pieces on top of the Mossy Meadow layer.
To finish off the inside, I cut a piece of Basic White cardstock to 10 cm x 12 cm and stamped a sentiment—“Thinking of You” from the With You In Mind stamp set—in the centre. I glued this inside the card.
And just like that—my card was finished! Bright, cheerful, and ready to send to someone special.
How I made my second Greeting Card from my One Sheet Wonder sheet

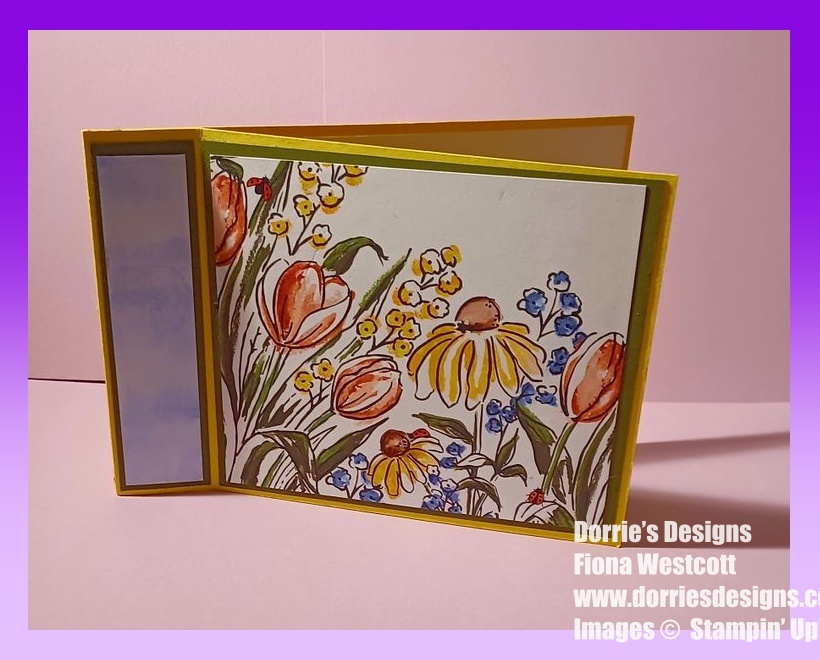
With the other half of the Daffodil Delight cardstock I had already cut, I created a different card design—this time with a fun Z-fold twist.
I started by scoring the front panel at 5.25 cm along the long edge and folded it back on itself to create a backwards Z shape. This adds a lovely interactive element to the card without any extra fuss!
Next, I cut a piece of Mossy Meadow cardstock to 10 cm x 14.4 cm and glued it onto the folded-back panel of the Daffodil Delight card base.
From my patterned paper panels, I chose one I really loved and trimmed it down to 9.5 cm x 13.9 cm, then adhered it to the Mossy Meadow layer.
To finish, I cut a piece of Basic White cardstock at 10 cm x 14.4 cm, stamped the “Thinking of You” sentiment from the With You In Mind stamp set, and glued it to the inside of the card.
And just like that—another beautiful card finished.
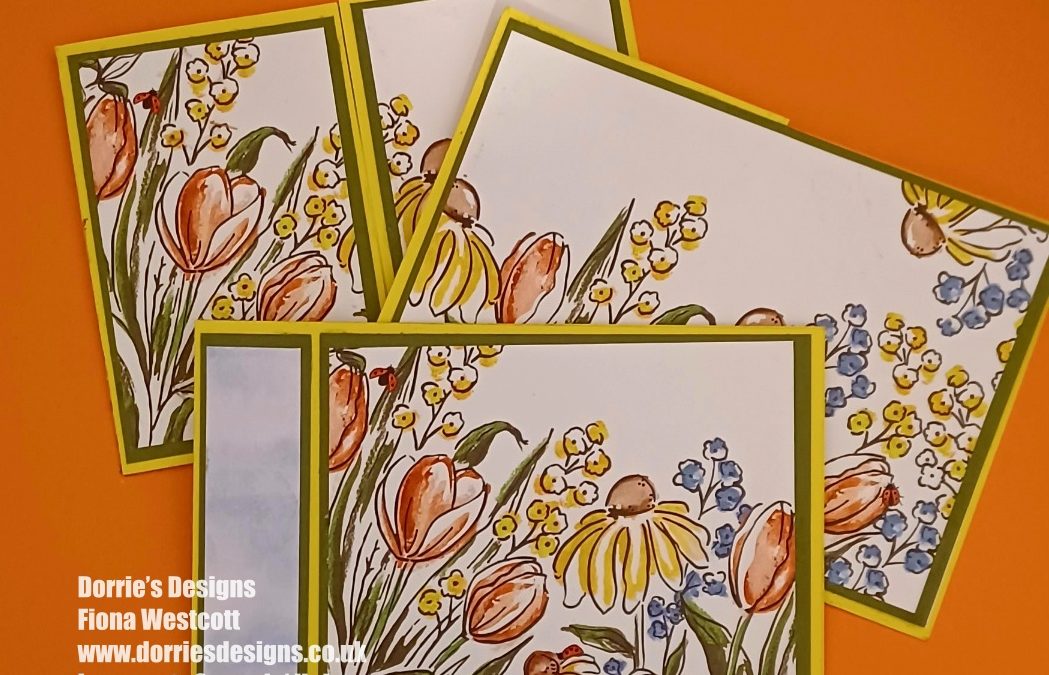
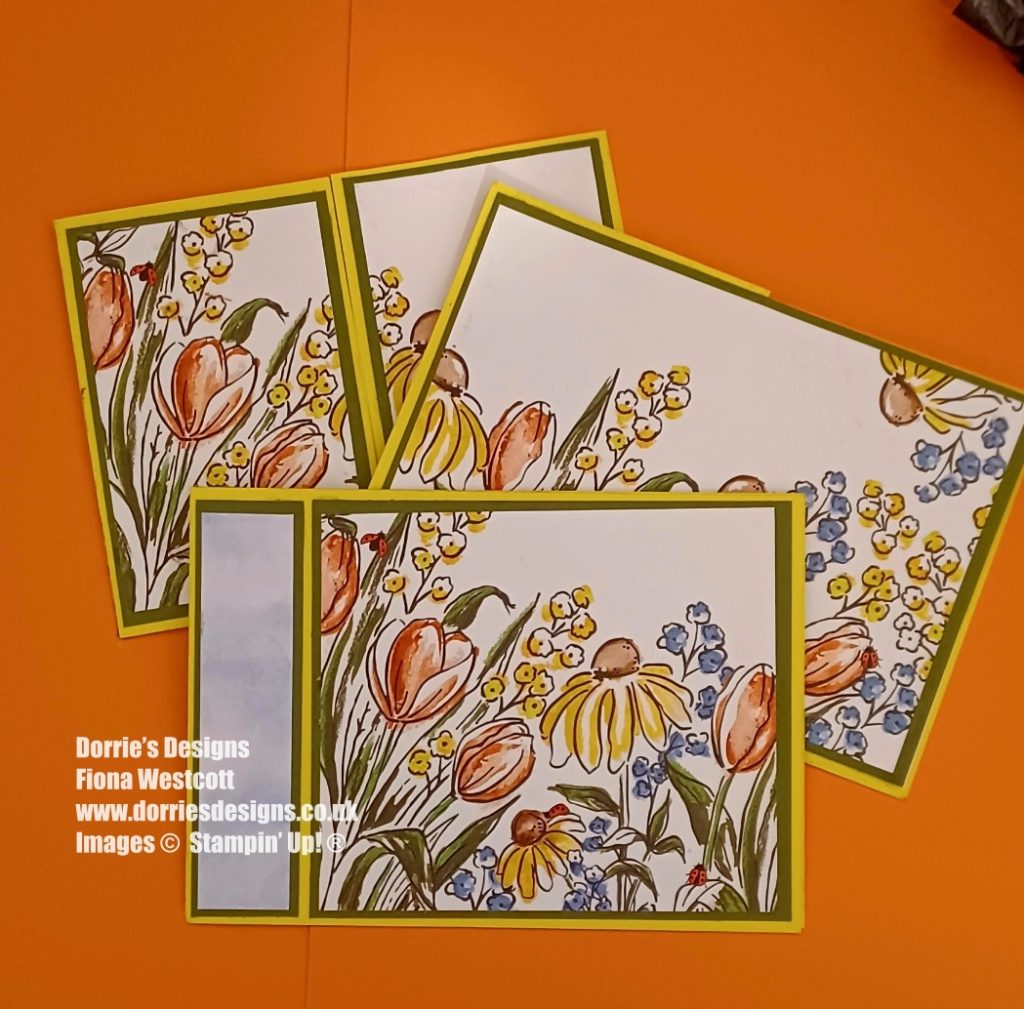
My completed batch of cards from one sheet of patterned paper
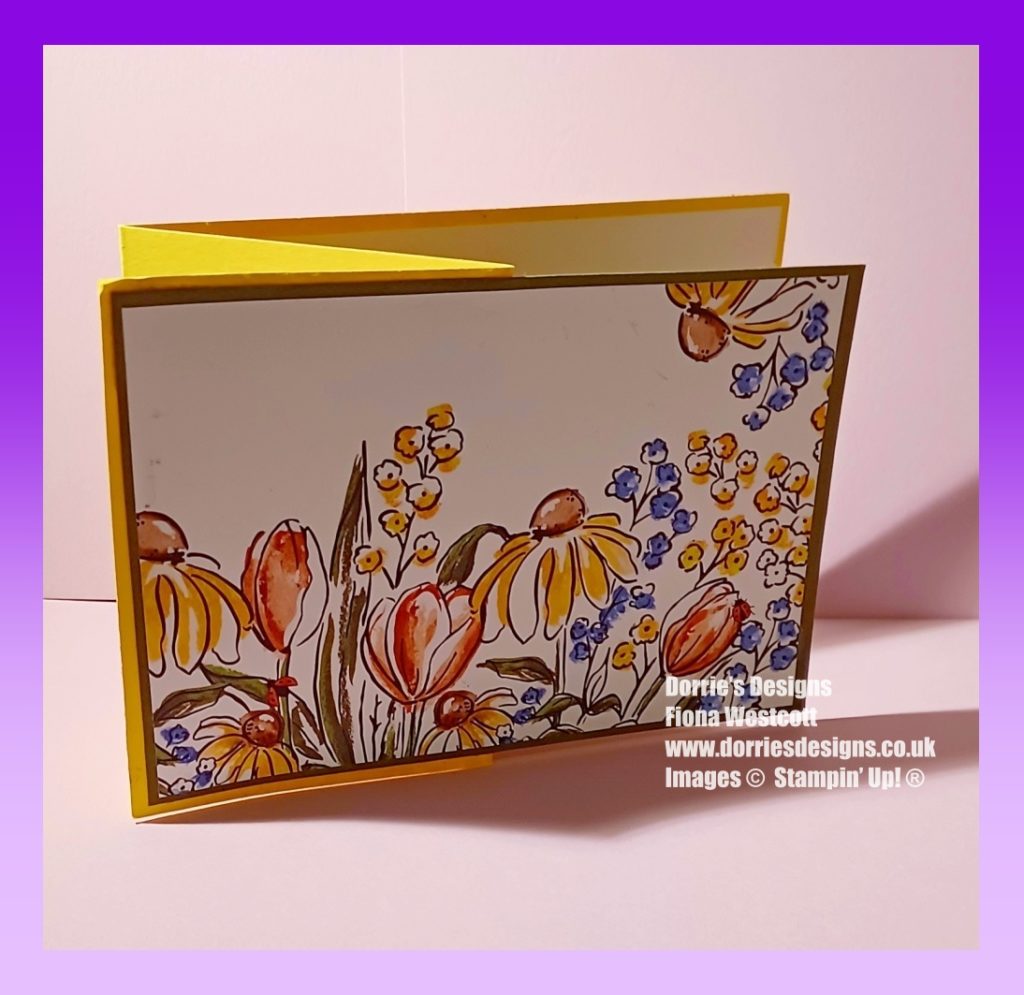
I’ve now written in some of the cards, and later today, Herbie and I will pop them into the post box during our walk.
Well, I think that’s all our news for now! If you do give the one sheet wonder design to create a batch of cards a try, I would absolutely love to see your creations, please share a photo.
Until next time, stay safe and happy crafting!.
Product List
![Mixed Media Florals 12" X 12" (30.5 X 30.5 Cm) Designer Series Paper [ 164638 ]](https://assets1.tamsnetwork.com/images/EC042017NF/164638s.jpg "Mixed Media Florals 12\" X 12\" (30.5 X 30.5 Cm) Designer Series Paper [ 164638 ]")
![With You In Mind Photopolymer Stamp Set (English) [ 164747 ]](https://assets1.tamsnetwork.com/images/EC042017NF/164747s.jpg "With You In Mind Photopolymer Stamp Set (English) [ 164747 ]")
![Mossy Meadow A4 Cardstock [ 133683 ]](https://assets1.tamsnetwork.com/images/EC042017NF/133683s.jpg "Mossy Meadow A4 Cardstock [ 133683 ]")
![Daffodil Delight A4 Card Stock [ 121680 ]](https://assets1.tamsnetwork.com/images/EC042017NF/121680s.jpg "Daffodil Delight A4 Card Stock [ 121680 ]")
![Basic White A4 Cardstock [ 166781 ]](https://assets1.tamsnetwork.com/images/EC042017NF/166781s.jpg "Basic White A4 Cardstock [ 166781 ]")
![Basic White C6 Envelopes [ 159235 ]](https://assets1.tamsnetwork.com/images/EC042017NF/159235s.jpg "Basic White C6 Envelopes [ 159235 ]")
![Multipurpose Liquid Glue [ 154974 ]](https://assets1.tamsnetwork.com/images/EC042017NF/154974s.jpg "Multipurpose Liquid Glue [ 154974 ]")
![Paper Trimmer [ 152392 ]](https://assets1.tamsnetwork.com/images/EC042017NF/152392s.jpg "Paper Trimmer [ 152392 ]")
![Tuxedo Black Memento Ink Pad [ 132708 ]](https://assets1.tamsnetwork.com/images/EC042017NF/132708s.jpg "Tuxedo Black Memento Ink Pad [ 132708 ]")
![Clear Block D [ 118485 ]](https://assets1.tamsnetwork.com/images/EC042017NF/118485s.jpg "Clear Block D [ 118485 ]")
![Clear Block E [ 118484 ]](https://assets1.tamsnetwork.com/images/EC042017NF/118484s.jpg "Clear Block E [ 118484 ]")
![Bone Folder [ 102300 ]](https://assets1.tamsnetwork.com/images/EC042017NF/102300s.jpg "Bone Folder [ 102300 ]")
Free Tutorial With all Orders
When shopping through my Stampin’ Up! Online Shop, you will receive a FREE TUTORIAL of 11 simple card ideas. Learn More!
If you wish to shop with me, please click here
Thank you for shopping with me.
I am an Independent Stampin’ Up! Demonstrator for the UK, France, Germany, Ireland, Belgium, Austria, and the Netherlands.
Herbie and I would love you to shop with us. If you set up an online account with us and opt in for Stampin’ Up! Rewards for every order over £20 you will receive 10% rewards to use on your next order, or you can do like I do and save them for a future order. They soon mount up, enabling you to purchase more expensive products with your saved rewards. Please do ask if you need any help.


KITS, I particularly love the Kits as everything is included, making them ideal for the beginner crafter, the crafter with limited space, they make beautiful birthday presents and are small enough to pack to take away on holiday. There are two new kits every month.
ONLINE EXCLUSIVES These are beautiful products that aren’t in any catalogue. Check back regularly as it’s frequently updated.
LAST CHANCE PRODUCTS – These are products about to retire. There’s up to 60% off normal prices, while stocks last. Why not grab yourself a bargain
Postage is a flat rate of £6.95/€7.95 on all orders.
🌟 Got a crafty wish list a mile long? Why not come and join our team, The Crafty Caterpillars! We’re building a welcoming, inclusive community where everyone’s invited to create, connect, and have fun. Whether you’re a beginner or a seasoned crafter, we’d love to craft with you—in person or online!
🎁 Right now you can grab £130 worth of products for just £99
If you need any help or have any questions, please send us a message.

