

It’s a cold and wet day today so I’ve just made a batch of Thank You cards using a simple layout that allowed me to make four cards at once. Before I share how I created them, I wanted to share what Herbie and I have been up to recently.
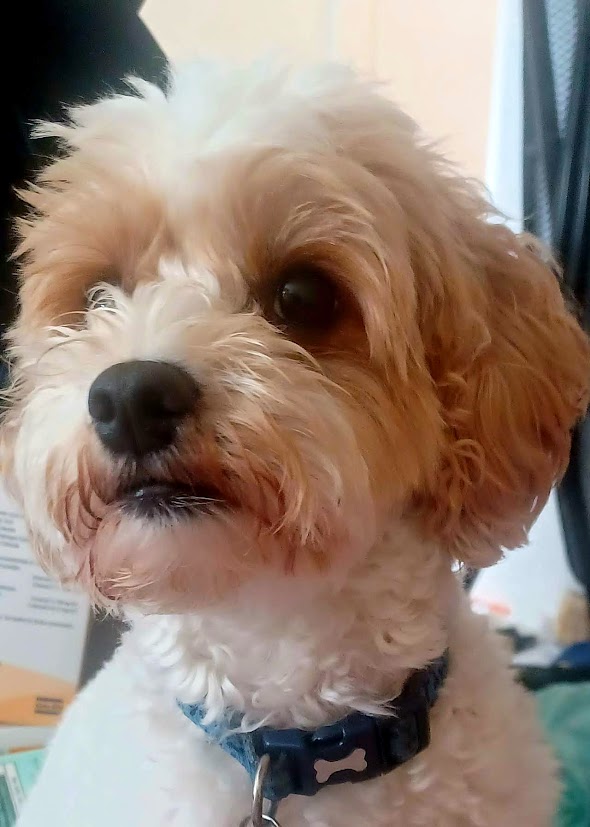
We’ve been enjoying lots of lovely walks in between the rain showers, looking for signs of spring as the trees begin to get leaves and bulbs pop up in gardens. Both Herbie and I hate getting wet— it wreaks havoc with my Fibromyalgia, and Herbie has an instant aversion to water in any form. He’s perfected his emergency stop while chasing dogs on the beach, coming to a halt just in time at the seashore edge to avoid getting his paws wet in the sea.
The other week, it looked like a dog scrum as Herbie stopped abruptly to avoid the water, and the dogs chasing him crashed into him instead of continuing into the sea. Luckily, they were all fine and decided that chasing the ball on the beach was a much better game.
The only time Herbie gets wet is when he goes to the dog groomers, or under protest he’ll allow me to bath him if he comes back from the park looking like a pig rolled in mud. But given the chance, he will groom himself and be spotlessly clean within an hour of being home.
How I got inspiration for todays cards.
On rainy days when the grass is muddy and soaked with all the rain, I take Herbie on the longest route to Mum’s house or choose walks that stick to pavements to avoid the mud. Herbie loves to sniff any dogs we encounter, and I enjoy chatting with their owners. It’s also lovely to look over the fences and see signs of spring with bulbs popping up from the ground.
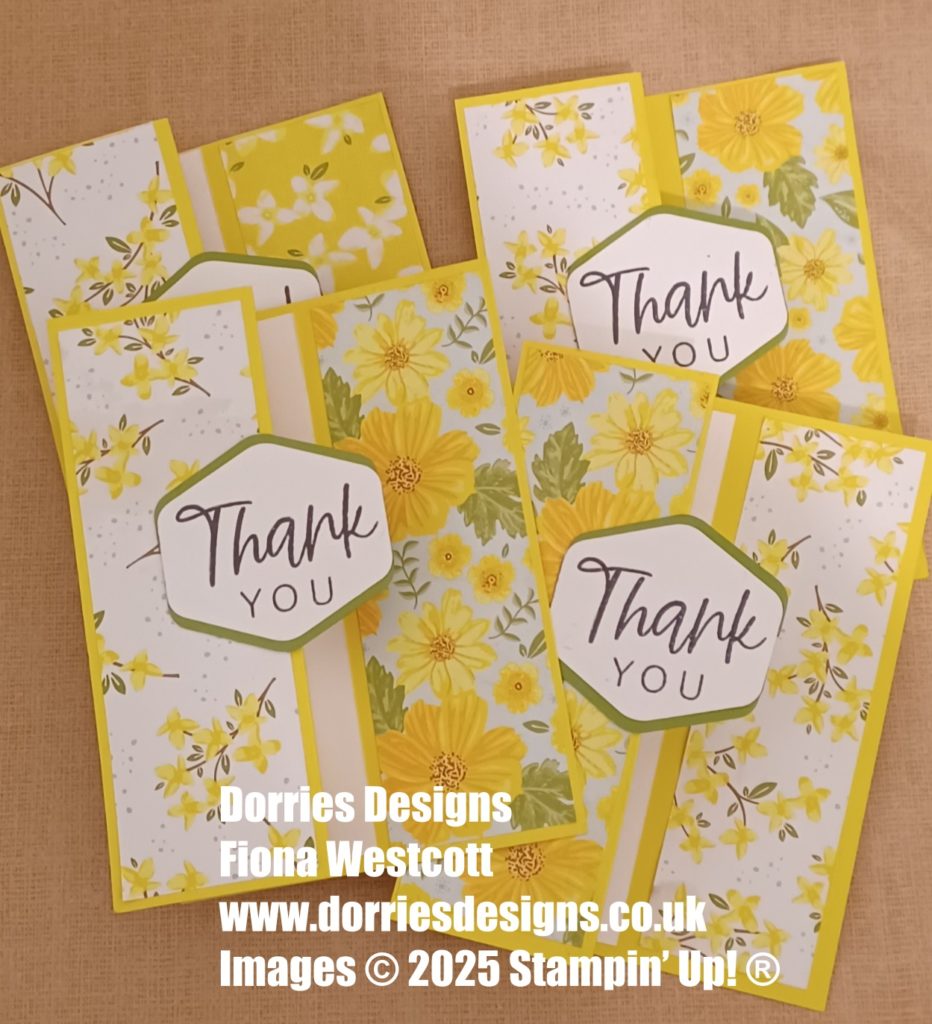
The Floral Delight patterned paper I used to create today’s four Thank You cards reminds me of the Tête-à-Tête, Daffodils, and Primroses we have seen on our walks.
How I created my batch of 4 quick and simple Thank You cards
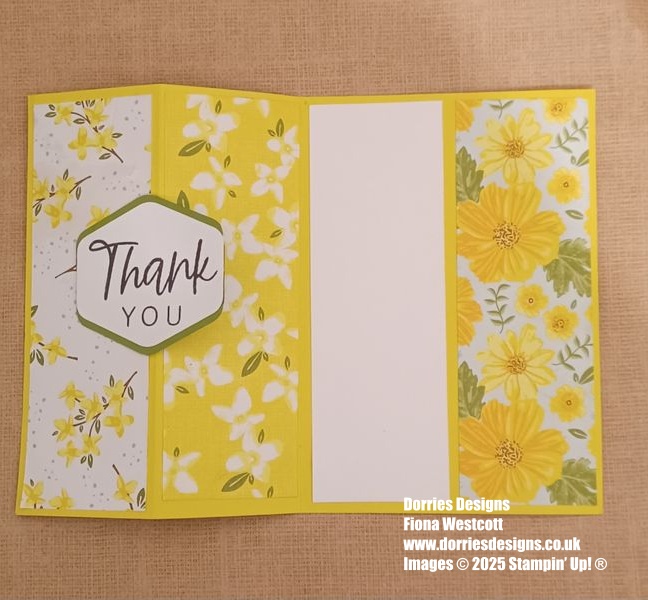
I started with two pieces of Daffodil Delight cardstock which I scored each one along the short edge at 10.5 cms and at 5.25 cms.
I then cut them both at 14.85cms. I now have the card bases for my four cards.
Next I chose the patterned paper I wanted to use. I chose the new Floral Delight 12 x 12 patterned paper and cut 4 strips from 3 of the colours measuring 14.4 cms x 4.75 cms. For each card I used one strip of each pattern. I chose the order I wanted to put these on my card and glued them down.
I cut a Basic White layer measuring 14.4 x 5.25cms for the centre for people to write their message.
I punched out 4 hexagon shapes using the Heartfelt Hexagon punch and using the With You In Mind stamp set I stamped Thank you on each hexagon using black Memento ink.
Next, I punched out two hexagons from Old Olive cardstock. I halved one of the hexagons and glued the halves behind the top and bottom of my Basic White hexagon, allowing a bit to stick out and create a border. For the other hexagon, I glued it behind the first hexagon to cover the gap left from where I had cut it in half.
We have now written in the cards and when it stops raining Herbie and I will pop them in the post box on our walk later.
Well I think that is all our news for now. If you do make some Thank You cards using this simple layout, please do share a photo we would love to see.
Until next time stay safe and happy crafting.
Product list
 Designer Series Paper")
")


Free Tutorial With all Orders
When shopping through my Stampin’ Up! Online Shop, you will receive a FREE TUTORIAL of 11 simple card ideas. Learn More!
If you wish to shop with me, please click here
Thank you for shopping with me.
I am an Independent Stampin’ Up! Demonstrator for the UK, France, Germany, Ireland, Belgium, Austria, and the Netherlands.
Herbie and I would love you to shop with us. If you set up an online account with us and opt in for Stampin’ Up! Rewards for every order over £20 you will receive 10% rewards to use on your next order, or you can do like I do and save them for a future order. They soon mount up, enabling you to purchase more expensive products with your saved rewards. Please do ask if you need any help.
KITS, I particularly love the Kits as everything is included, making them ideal for the beginner crafter, the crafter with limited space, they make beautiful birthday presents and are small enough to pack to take away on holiday. There are two new kits every month.
ONLINE EXCLUSIVES These are beautiful products that aren’t in any catalogue. Check back regularly as it’s frequently updated.
LAST CHANCE PRODUCTS – These are products about to retire. There’s up to 60% off normal prices, while stocks last. Why not grab yourself a bargain
Postage is a flat rate of £6.95/€7.95 on all orders.
🌟 Got a crafty wish list a mile long? Why not come and join our team, The Crafty Caterpillars! We’re building a welcoming, inclusive community where everyone’s invited to create, connect, and have fun. Whether you’re a beginner or a seasoned crafter, we’d love to craft with you—in person or online!
🎁 Right now you can grab £130 worth of products for just £99
If you need any help or have any questions, please send us a message.


Wow another fab job by our fantastic Fiona well don you they are lovely can not wait till Monday when we get dondo some card
Thank you Zoe. I am looking forward to sharing this months Card and Chatter cards with you.
gorgeous bright and cheerful quick cards 😍
Thank you Cary. It was such a cold wet day when I created them I just wanted to make something that reminded me Spring was on it’s way